
- Home
- General
- Getting Started
- Understanding the Editor Interface
Understanding the DIY Website Builder Editor Interface | Beginner’s Guide
When you open the DIY Website Builder editor, you'll see an intuitive workspace designed to help you build your website efficiently.
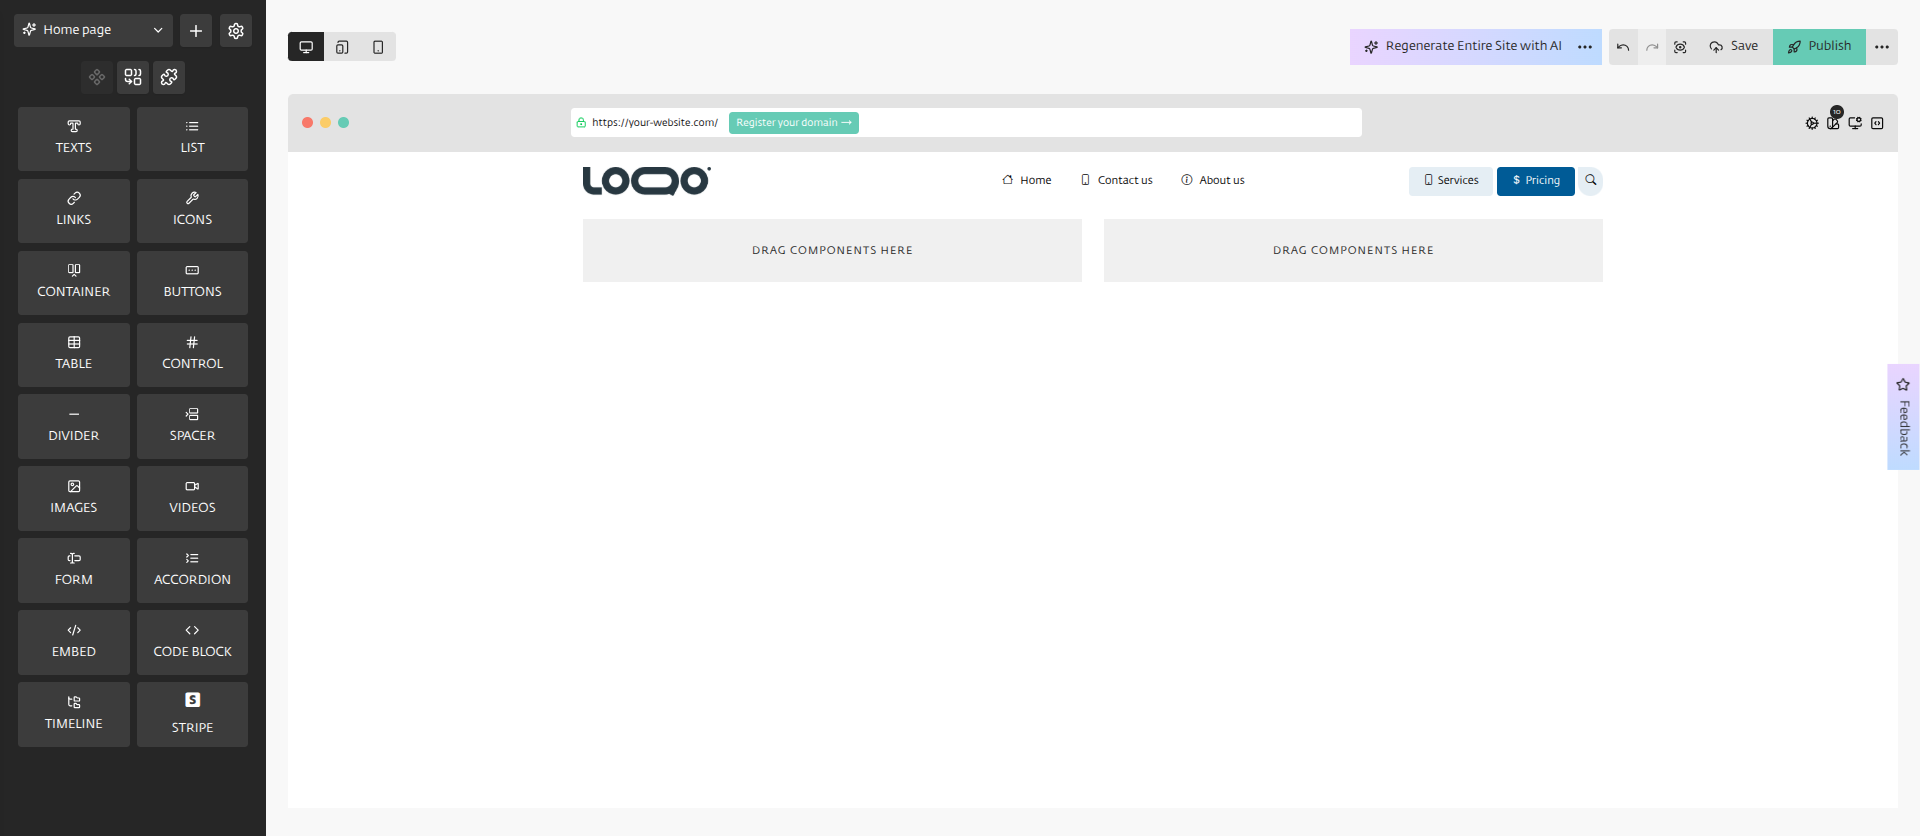
Main Components:
Left Sidebar: Access to elements and section presets
Top Navigation: Page selection, device preview, and publishing options
Canvas: Your working area showing the current website design
Right Panel: Properties panel for customizing selected elements (colors, fonts, spacing, etc.)
Left Sidebar Elements:
The left sidebar contains all the built-in components you can drag onto your page:
- Text - Add headings, paragraphs, and other text elements.
- List - Create bulleted or numbered lists.
- Links - Add clickable links to your content.
- Icons - Insert various icons to enhance your design.
- Container - Group elements together for easier management.
- Buttons - Add call-to-action buttons.
- Table - Insert structured data tables.
- Control - Add interactive control elements.
- Divider - Add horizontal lines to separate content.
- Spacer - Add customizable blank space to organize and separate content.
- Image - Upload and place images.
- Video - Embed videos into your pages.
- Form - Integrate contact or subscription forms to engage users and capture leads effectively.
- Accordion - Create expandable content sections.
- Embed - Insert external content or code.
- Code Block - Display lines of code, often with syntax highlighting.
- Timeline - Display chronological events or milestones in a sidebar format.
- Stripe - Add payment functionality.

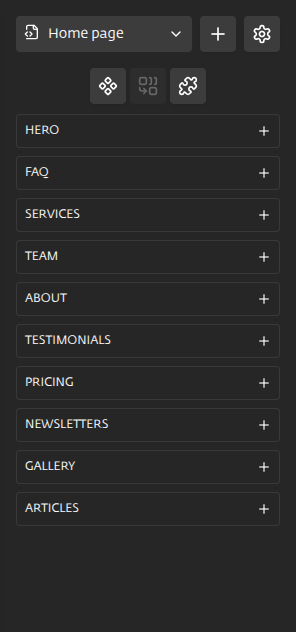
Section Presets
The left sidebar also gives you access to complete section presets.
- Testimonials - Customer review sections.
- Services - Product/service offerings and details.
- Hero - Main banner sections with visual impact.
- About - Team and company information layouts.
- Newsletters - Sections for newsletter sign-ups and archives.
- Team - Dedicated sections for team member profiles.
- Pricing - Pricing tables and comparison charts.
- Articles - Layouts for blog posts or detailed written content.
- Gallery - Pre-designed templates that allow you to easily create a photo gallery.
- FAQ - Frequently Asked Questions sections.
Top Navigation Bar
The top navigation bar provides quick access to essential features and tools, allowing users to efficiently manage and edit your content.

Device preview toggles show how your site appears on desktop, tablet, and mobile devices.
On the far right, you'll find undo/redo buttons, save option, preview mode, and additional options (Publish, Download Page, Page settings, Export website, Website settings, and Exit)
- Related Articles
- Create your DIY Website Builder Account
- Create a Project in DIY Website Builder
- Customizing Your Design
- Previewing Your Design on Different Devices
- Adding a New Page in Your Project
- Deploying Your Website
- Deleting Your Website
Still Need Help?
If you have any further questions or require additional
assistance, please don't hesitate to reach out to our support
team.